Install Nessus on Kali Linux
If you are new to Kali Linux or don't about package or software installation in Kali Linux then you are at the right place in today's blog I am going to tell you how to install Nessus in Kali Linux, I also tell you how you can start a scan and then we will discuss Nessus different version so that if you are planning to use Nessus daily basis then you can decide which is best for you. so let's start with what is Nessus.
What is Nessus
Nessus is a popular tool made by Tenable Network Security for finding security problems in computer systems, networks, and infrastructure. It looks for things like weak spots in security, settings that aren't right, and other risks. Nessus checks out specific systems and then gives detailed reports. This helps organizations figure out what security issues to focus on and fix first.
Requiemets for Nessus
Before we start the installation process, make sure you have the following prerequisites:
Internet Connection: A stable internet connection is required to download the Nessus installation package.
Root Access: You need root access or sudo privileges to install software on your system.
Step-by-step guide: Install Nessus on Kali
Preparing Your System
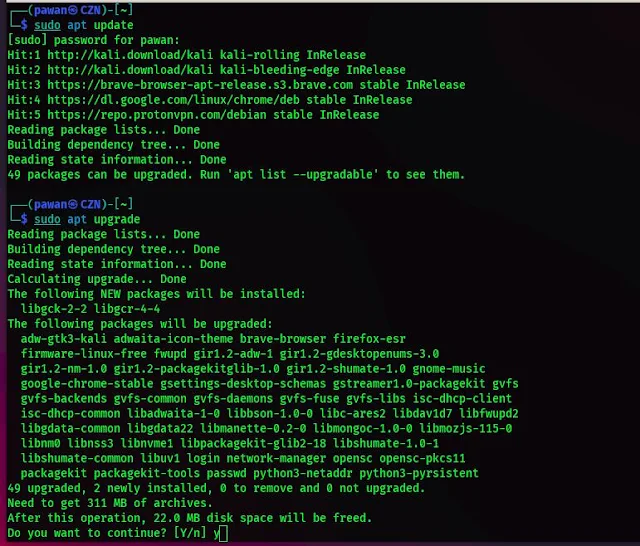
Before you start installing Nessus, make sure your Kali Linux is all updated. Just open a terminal window and type in these commands:
sudo apt update
sudo apt upgrade
This command makes sure that your system knows about all the latest software available, and it will also update any programs you already have to their newest versions. Doing this helps everything work smoothly and perform its best.
Install Dependencies for Nessus
Before installing Nessus, we need to install some dependencies. Open a terminal window and run the following command to install the required dependencies:
sudo apt-get install libssl1.1
Nessus download Kali Linux
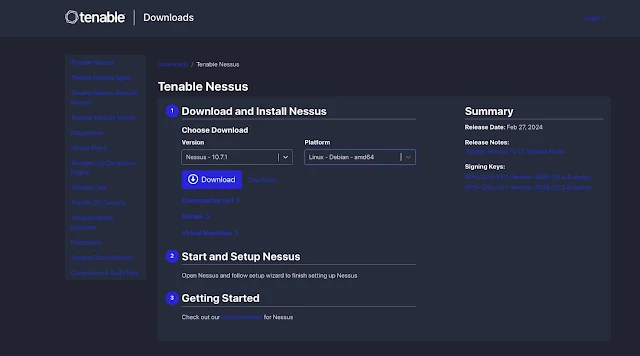
To download Nessus, visit the official website of Tenable, the company behind Nessus.
Now here select the plan or package you need they provide two: professional and expert. after that, you need to provide your name and work email. and then you can access the download page.
Here select the version and platform. we are installing in Kali Linux so select "Linux - Debian - amd64" and click on download and agree to the License Agreement.
After that downloading will begin. wait for it to download.
Install Nessus in Kali
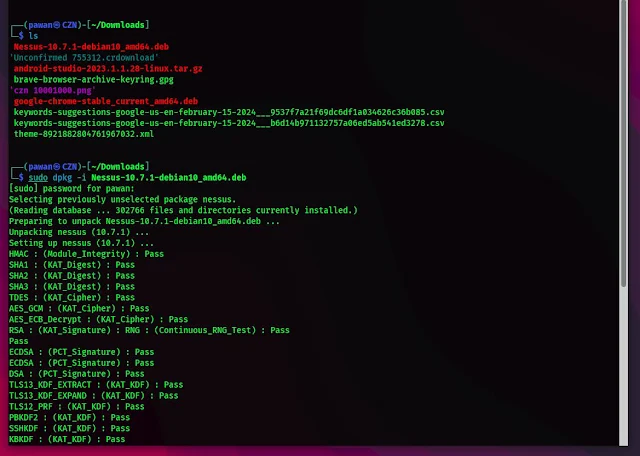
Now navigate to the directory where the Nessus package is downloaded, usually the Downloads folder. Use the following command to install Nessus:
sudo dpkg -i Nessus-<version>-amd64.deb
Replace <version> with the specific version number of the Nessus package you downloaded. This command will install Nessus on your Kali Linux system.
Start the Nessus service
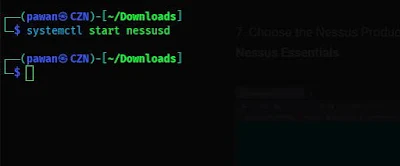
After the installation is complete, you need to configure Nessus before you can start using it. Execute the following command to start the Nessus service:
systemctl start nessusd
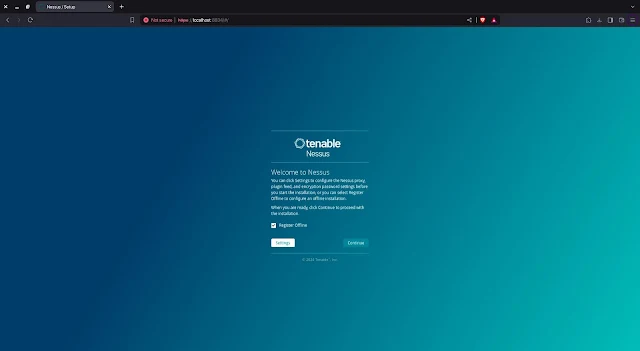
Once the service is started, open a web browser and navigate to https://localhost:8834.
Here browser will show you a warning that "Your connection is not secure".
click on "Advanced" and click on "Accept Risk and Continue".
You'll be prompted to create a new Nessus user account and set up your preferences.
Here check the "Register offline" box and click on continue.
Now on the next screen select the product type and log in.
Activating Nessus
You'll need to obtain an activation code from Tenable to activate Nessus and unlock its full potential.
Visit the Tenable website and log in to your account. Navigate to the Activation section and follow the instructions to obtain your activation code.
You can find full information here: https://docs.tenable.com/nessus/Content/UpdateLicenseOffline.htm
Once you have the activation code, return to the Nessus web interface and navigate to the Activation page. Enter the activation code and follow the prompts to complete the activation process.
How to Use Nessus in Kali Linux
With Nessus successfully installed, configured, and activated, you're ready to start scanning your systems for vulnerabilities.
- First Decide what you want to scan. This could be individual IP addresses, a range of IP addresses, or a hostname. Ensure you have the necessary permissions to scan the target.
- Now after we have the info about what we want to scan, open Nessus and navigate to the "Scans" tab.
- Click "New Scan" in the top right corner.
- Choose a scan template: Now we need to set or select the scan template. Nessus offers various pre-configured templates for different scanning purposes (e.g., basic network scan, and web application scan). Select the template that best suits your needs.
- Configure the scan settings: Each template has specific settings you can adjust. This could involve defining the target IP addresses, credentials for accessing the target, and plugin selection (specific vulnerability checks).
- Once you've configured the scan settings, click "Launch" to start the scan.
Different versions of Nessus
Before start using Nessus let us know about different versions of Nessus and then you can decide which version you should use.
So there are three main versions of Nessus: Nessus Essentials, Nessus Professional, and Nessus Expert. Each version has different features and capabilities, making them suitable for different needs.
1. Nessus Essentials
- This is a free version for individuals, educators, and small businesses.
- This can scan up to 16 IP addresses per scanner.
- This version can Identify various vulnerabilities, including operating system vulnerabilities, application vulnerabilities, and configuration weaknesses.
- Provides detailed information about each vulnerability, including its severity, exploit code, and remediation steps.
- Nessus Essentials offers a user-friendly interface for scanning your environment and viewing results.
- This can integrate with Tenable SecurityCenter for centralized vulnerability management (paid subscription required).
2. Nessus Professional
- Nessus Professional is a paid version specially made for security professionals and businesses.
- This can scan an unlimited number of IP addresses.
- Nessus Professional Includes all the features that come with Nessus Essentials, plus:
- Compliance checks for industry standards and regulations (e.g., PCI DSS, HIPAA)
- Advanced reporting capabilities
- Integration with Tenable security products (e.g., SecurityCenter, Lumin)
3. Nessus Expert
- Nessus Expert is the most advanced and feature-rich version of Nessus.
- This version Includes all the features of Nessus Professional, plus:
- Web application security scanning
- Cloud security posture management
- Advanced social engineering and phishing simulations
- Support for more operating systems and platforms
It depends on you which version you choose and it depends on your specific needs and budget. Nessus Essentials is sufficient if you are a small business or individual.
However, suppose you need to scan a large number of IP addresses, comply with industry regulations, or perform advanced security assessments. In that case, Nessus Professional or Nessus Expert may be a better choice.
Conclusion
In conclusion, installing Nessus on Kali Linux is a plain process that provides immense value in enhancing the security posture of your systems. By following the steps outlined in this guide, you can harness the power of Nessus to proactively identify and mitigate potential security risks.
Remember to regularly update Nessus and perform periodic scans to stay ahead of emerging threats and ensure the integrity of your systems.
If you love this article don't forget to follow us on social media and subscribe to our newsletter to never miss an important update.
