What is Termux and installing Python in Termux?
You all know that Python is a popular programming language used in various fields like Web development, Game development, the Education sector, Artificial Intelligence, Machine learning, and many more. You can easily execute your Python code on your computer system or laptop but what do you do, if you want to execute that Python code in Android?
So today you will learn how to install and execute Python in Android using Termux.
Firstly, you will learn to install Termux in Android and then how you can execute Python code using Termux (Step by Step).
What is Termux?
Termux is a terminal application that gives you access to establish a Linux-compatible platform on your Android device and allows you to access all Linux software packages through a text-based terminal.
How to install Termux in Android?
Now, you will learn how to install and use Termux on your Android device (Step by Step).
Step 1:
Firstly, you have to visit this link.
Step 2:
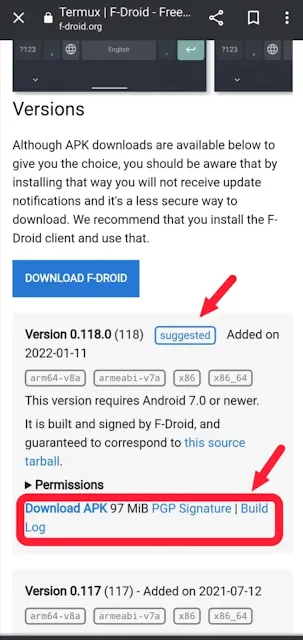
Now you have an interface of F-Droid, Scroll down and click on Download APK (The first version is the default/suggested version of Termux according to your device).
Step 3:
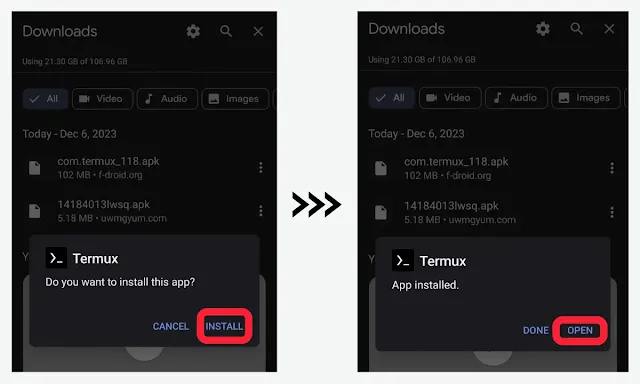
After the completion of the download, press on the downloaded file to install Termux, and after installing, click on open to start Termux.
Step 4:
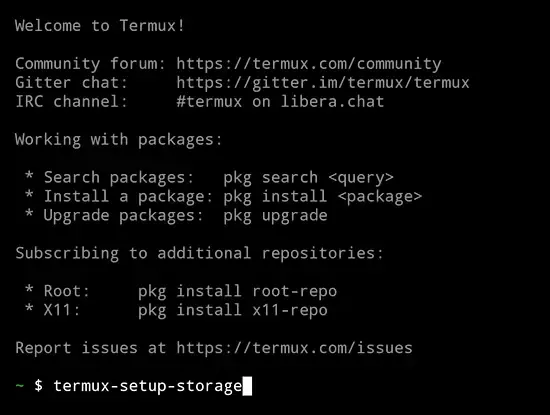
Now you will have the Termux Welcome Screen.
Step 5:
Here you will have to give Storage Permission to it using Command.
termux-setup-storage
Step 6:
You will get a popup asking for permission to access the storage, Click allow.
Installing Python in Termux:
After installing Termux on your device, you have to follow the steps given below with proper images for better understanding.
Step 1:
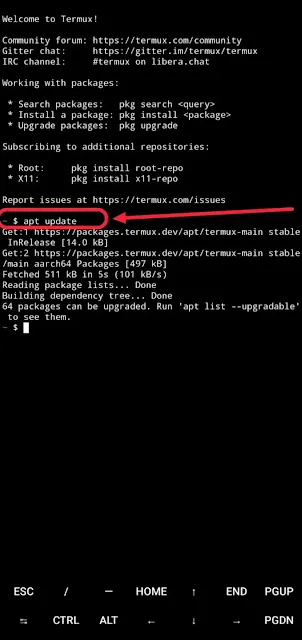
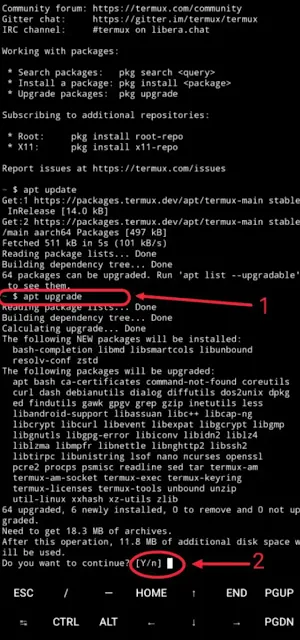
Firstly, you have to type a commandapt update.
Step 2:
After completion of this command, type another command apt upgrade and between the execution of this command it will ask you for Yes[Y] or No[n], then type “Y”.
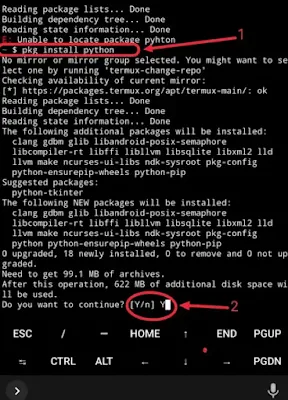
Step 3:
Now type the command pkg install python and it also asks for Yes[Y] or No[n], so type “Y”.
Here you can also use these two commands pkg install python2 and pkg install python3 to install another version of Python.
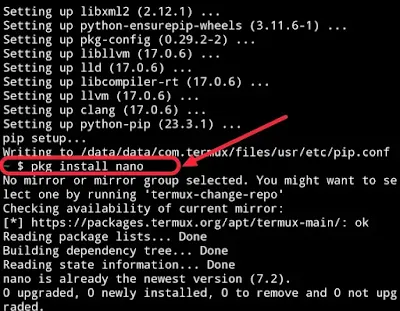
Step 4:
Then type pkg install nano.
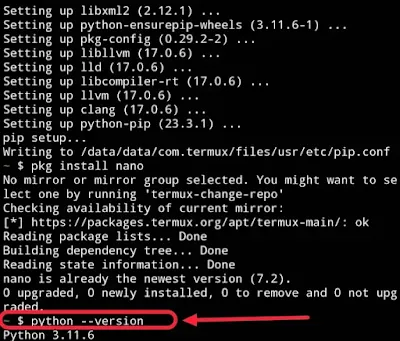
Step 5:
To check the version of Python, you have to type the python –version command. If it doesn’t give any error then you have successfully installed Python in Termux.
Steps to run Python in Termux:
Step 1:
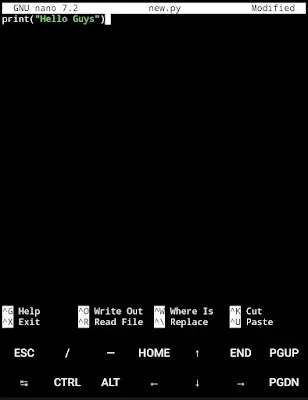
Firstly, you have to create a file with a (.py) extension with the help of nano. So type
nano new.py (Here new is the name of the file).
Step 2:
After creating the file, you have a new interface and then type print(“Hello Guys”).
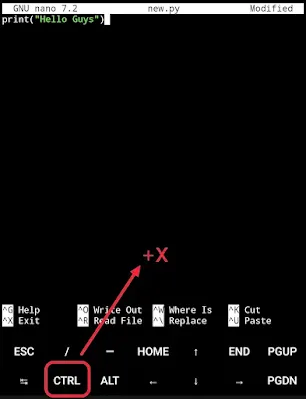
Step 3:
Now save the file by clicking on CTRL + X or the Volume down button + X.
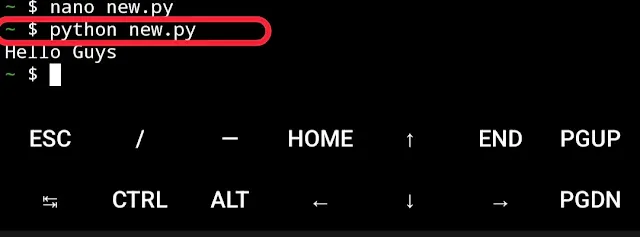
Step 4:
In the last step you have to type python new.py and the result “Hello Guys” will be printed.
I hope you successfully installed Python in Termux and executed your code.
Thanks for Visiting
.webp)



.webp)